[프로젝트 생성하기]
https://honeystorage.tistory.com/252?category=784116
[개발환경 세팅하기]
https://honeystorage.tistory.com/253?category=784116
에 이어서
실제 개발에는 필수적이라고 할수있는
절대경로, 스타일 모듈 및 에디터 설정을 진행할것이다.
키워드는
babel-plugin-module-resolver
styled-components
prettier
3가지 이다.
먼저, styled-components를 통해 개발하기 위한 설정을 해주고
아주 작은 컴포넌트를 만들어볼것이다.
1. styled-components
설치를 해보자.
npm i --save styled-components
npm i --save-dev babel-plugin-styled-components @types/styled-components @types/styled-components-react-native
이제, babel.config.js에 코드 한줄만 추가해보자.
module.exports = {
  presets: ['module:metro-react-native-babel-preset'],
  plugins: ['babel-plugin-styled-components'], // 이것 추가
};
자, 설정은 모두 끝났다.
이전에 react를 다뤄봤다면 어렵지않게
styled-components로 컴포넌트를 하나 만들어본다.
// App.tsx

const CustomBox = styled.View`
  width: 200px;
  height: 200px;
  background-color: red;

  // display: flex; - react-native의 View는 기본이 flex이다.
  align-items: center;
  justify-content: center;
`;

const CustomText = styled.Text`
  font-size: 16px;
  color: white;
  text-align: center;
`;

const App = () => {
  ...

  return (
    ...
      <CustomBox>
        <CustomText>제가 직접 만들었어요</CustomText>
      </CustomBox>
    ...
  )
}
화면에서 확인해보자
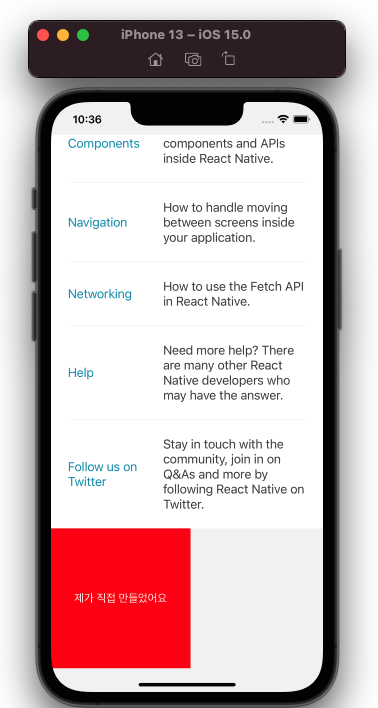
이런 이미지가 잘 나타났는가?
그렇다면 styled-components 개발환경 세팅은 끝났다고 볼수있다.
그런데 우리는 App.tsx 에서만 개발을 진행할수는 없다.
작은 단위로 구조화해서 개발을 진행해야하는데
그러려면 절대경로 설정은 필수라고 할수있다.
"../../../../../" 와 같은 지옥을 맛보기 싫다면
(다만, 규모가 작은 프로젝트에서
절대경로 설정에 어려움을 겪는다면
굳이 설정할 필요는 없다고 생각한다.
그 시간에 빨리 작업을 마치는것도
개발 센스라고 본다.)
2. 절대경로 세팅하기
babel-plugin-module-resolver 를 설치하자.
npm i --save-dev babel-plugin-module-resolver
https://www.npmjs.com/package/babel-plugin-module-resolver
여기 가이드라인이 제법 잘 나와있다
따라해 보자.
루트 경로 아래에 src 폴더를 하나만든 뒤
// babel.config.js 파일을 만들고 아래와 같이 설정

{
  "plugins": [
    [
      "module-resolver",
      {
        "root": ["."],
        "alias": {
          "@components": "./src/components",
        },
        "extensions": [".ios.ts",".android.ts", ".ts", ".ios.tsx", ".android.tsx", ".tsx", ".jsx", ".js", ".json"]
      }
    ]
  ]
}
// tsconfig.json
{
"compilerOptions": {
...
"baseUrl": "./src",
"paths": {
"@components": [
"./components/*"
],
}
...
}
}
빨간줄이 나온다거나 컴파일 에러가 보여질수 있습니다.
열려있는 스크립트 파일은 모두 닫고,
실행중인 런타임도 종료한뒤
npm start --reset-cache위 명령어로 다시 런타임을 실행하면
정상적으로 절대경로 사용이 가능해진것을
확인해볼 수 있습니다.
그렇다면 이전에 작성한 코드를 옮겨봅니다.
./src/components/sample.tsx 파일을 만들고
해당 파일로 이전에 작성한 CustomText, CustomBox 코드를 옮깁니다.
// ./src/components/sample.tsx

import styled from 'styled-components/native';

const CustomBox = styled.View`
  width: 200px;
  height: 200px;
  background-color: red;

  // display: flex; - react-native의 View는 기본이 flex이다.
  align-items: center;
  justify-content: center;
`;

const CustomText = styled.Text`
  font-size: 16px;
   color: white;
   text-align: center;
`;

export { CustomBox, CustomText };
// App.tsx
import { CustomBox, CustomText } from '@components/sample';
const App = () => {
...
return (
...
<CustomBox>
<CustomText>제가 직접 만들었어요</CustomText>
</CustomBox>
...
)
}
정상적으로 실행된다면
개발을 위한 환경을 얼추 다 갖추었다.
이제 팀원간 코드를 어떻게 작성할지
어떤 스타일 가이드에 따라 작성할지를
세팅하는 ./prettierrc 를 작성할 차례이다.
기본파일로 ./prettierrc.js가 생성되어있는데
원하는대로 커스텀해보자
// 예시
module.exports = {
  bracketSpacing: false,
  jsxBracketSameLine: true,
  singleQuote: true,
  trailingComma: 'all',
  arrowParens: 'avoid',
  semi: true,
  useTabs: false,
  tabWidth: 4,
  printWidth: 120,
};